Entering the data manually is an easy and reliable way to add users' information to the system. With the first data entered, you will be able to manipulate it through Analytics, Dashboards and Reports.
In this section we will discuss the following:
Dates are reflecting the frequency of KPIs data. They correspond to the days when KPI data should be entered. By means of interface functionality, you can change the order of the dates and set daily, weekly, monthly & etc. sequence. To select a date, follow these steps:
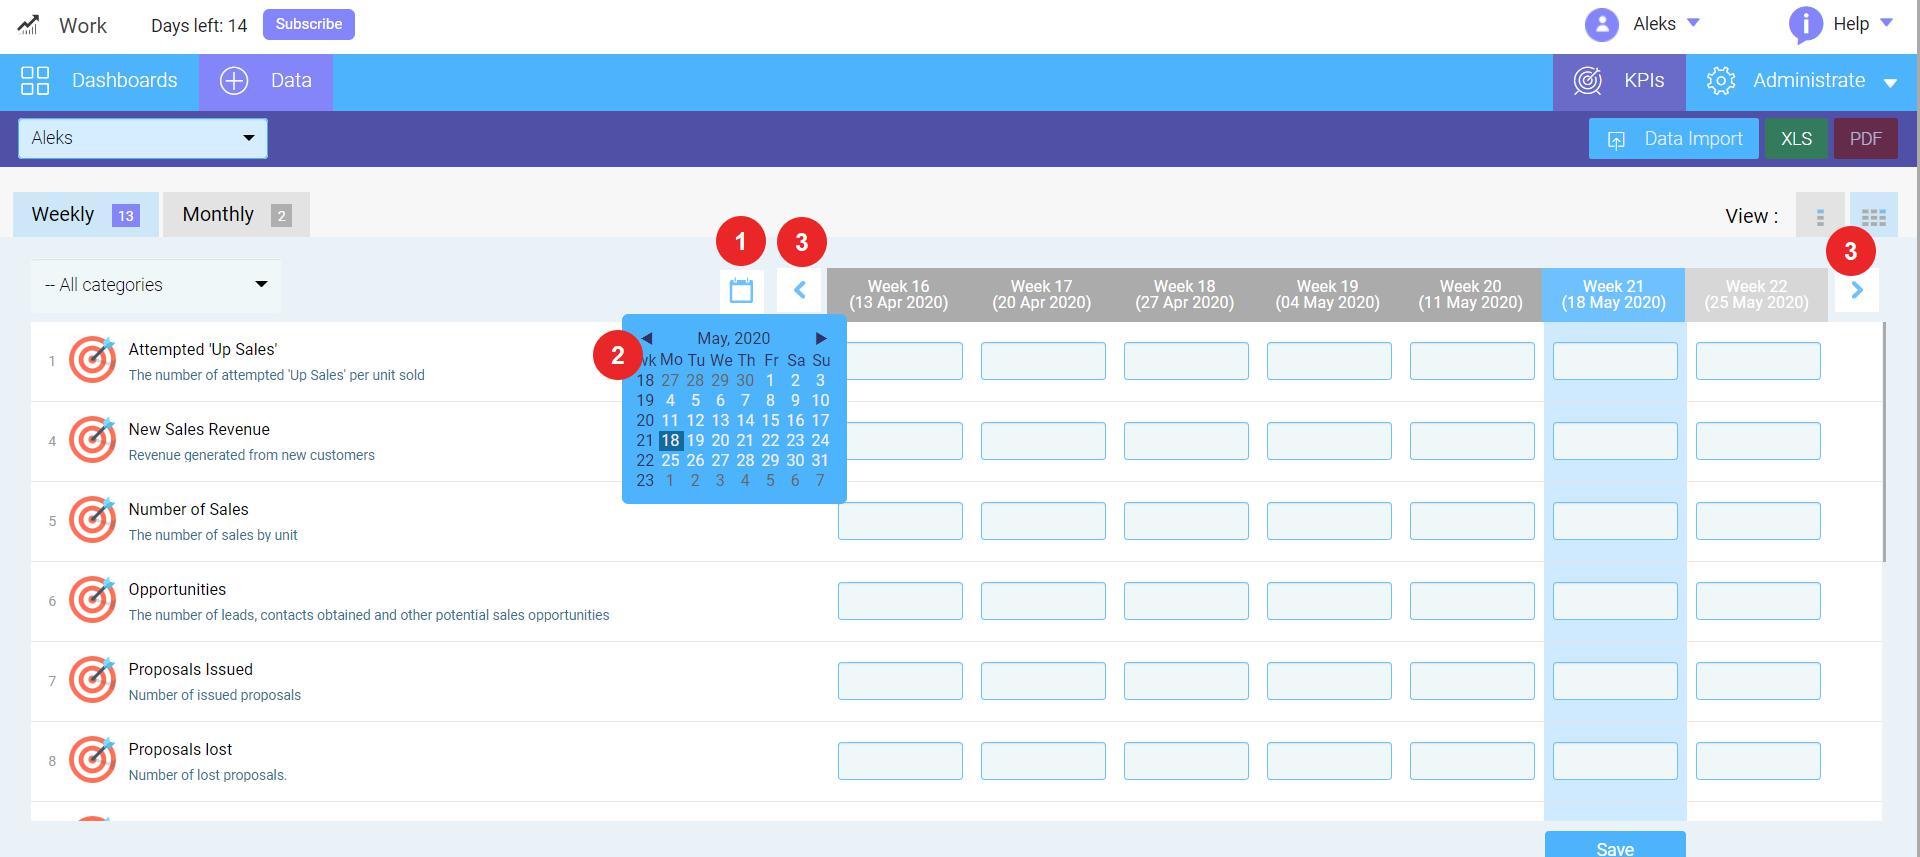
Note: Press Back and Forward (3) buttons to navigate to next or previous KPI entry dates (frequencies).
After selecting the date, you can fill in each KPI field with data:
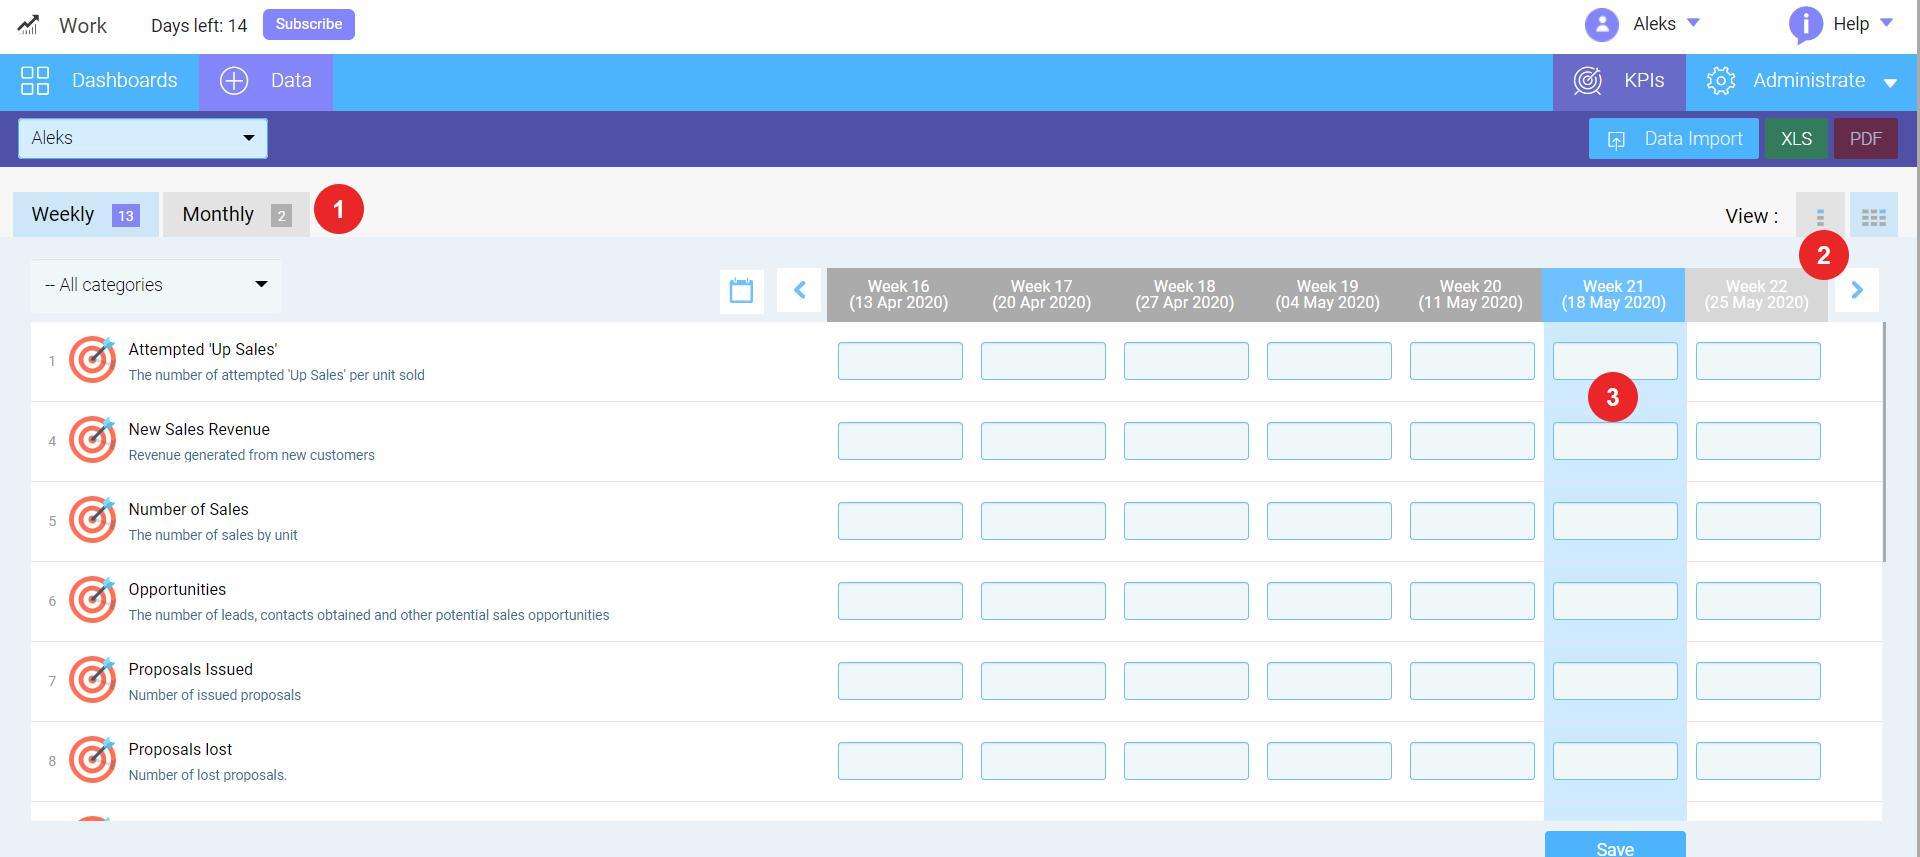
If not specified otherwise, trend and the target % fields will be calculated and saved automatically.
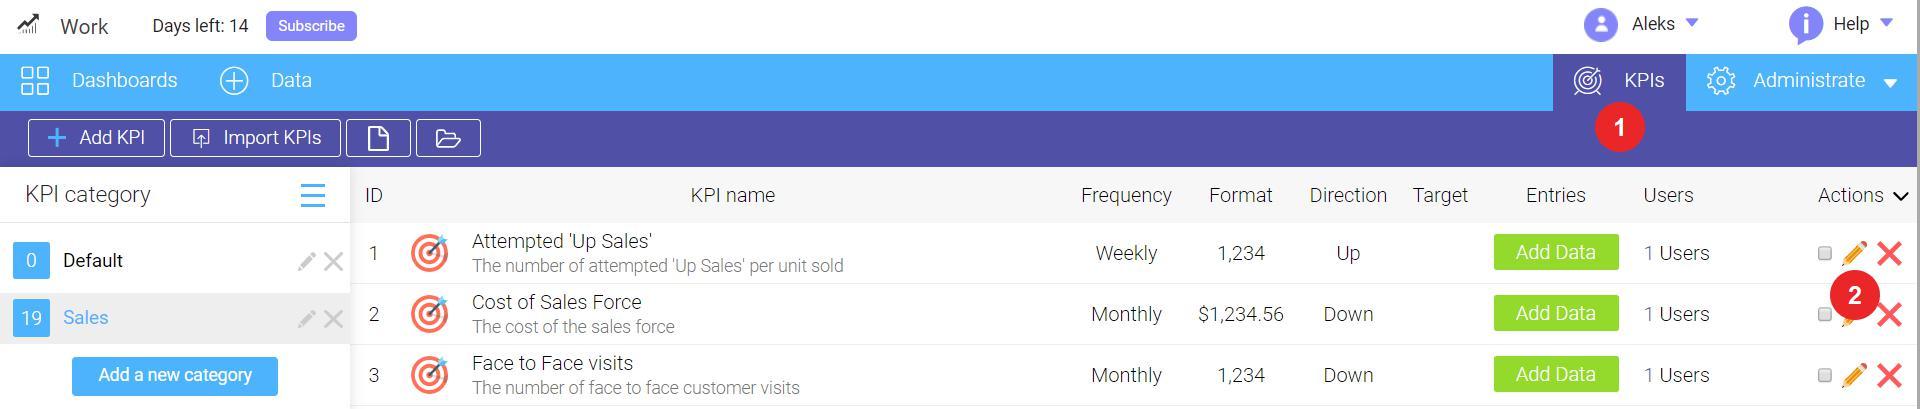
Note: KPIs can be filtered by category with a help of KPI category drop-down filter.
Note: Historic data can be modified manually by navigating to the specific date and changing KPI values.
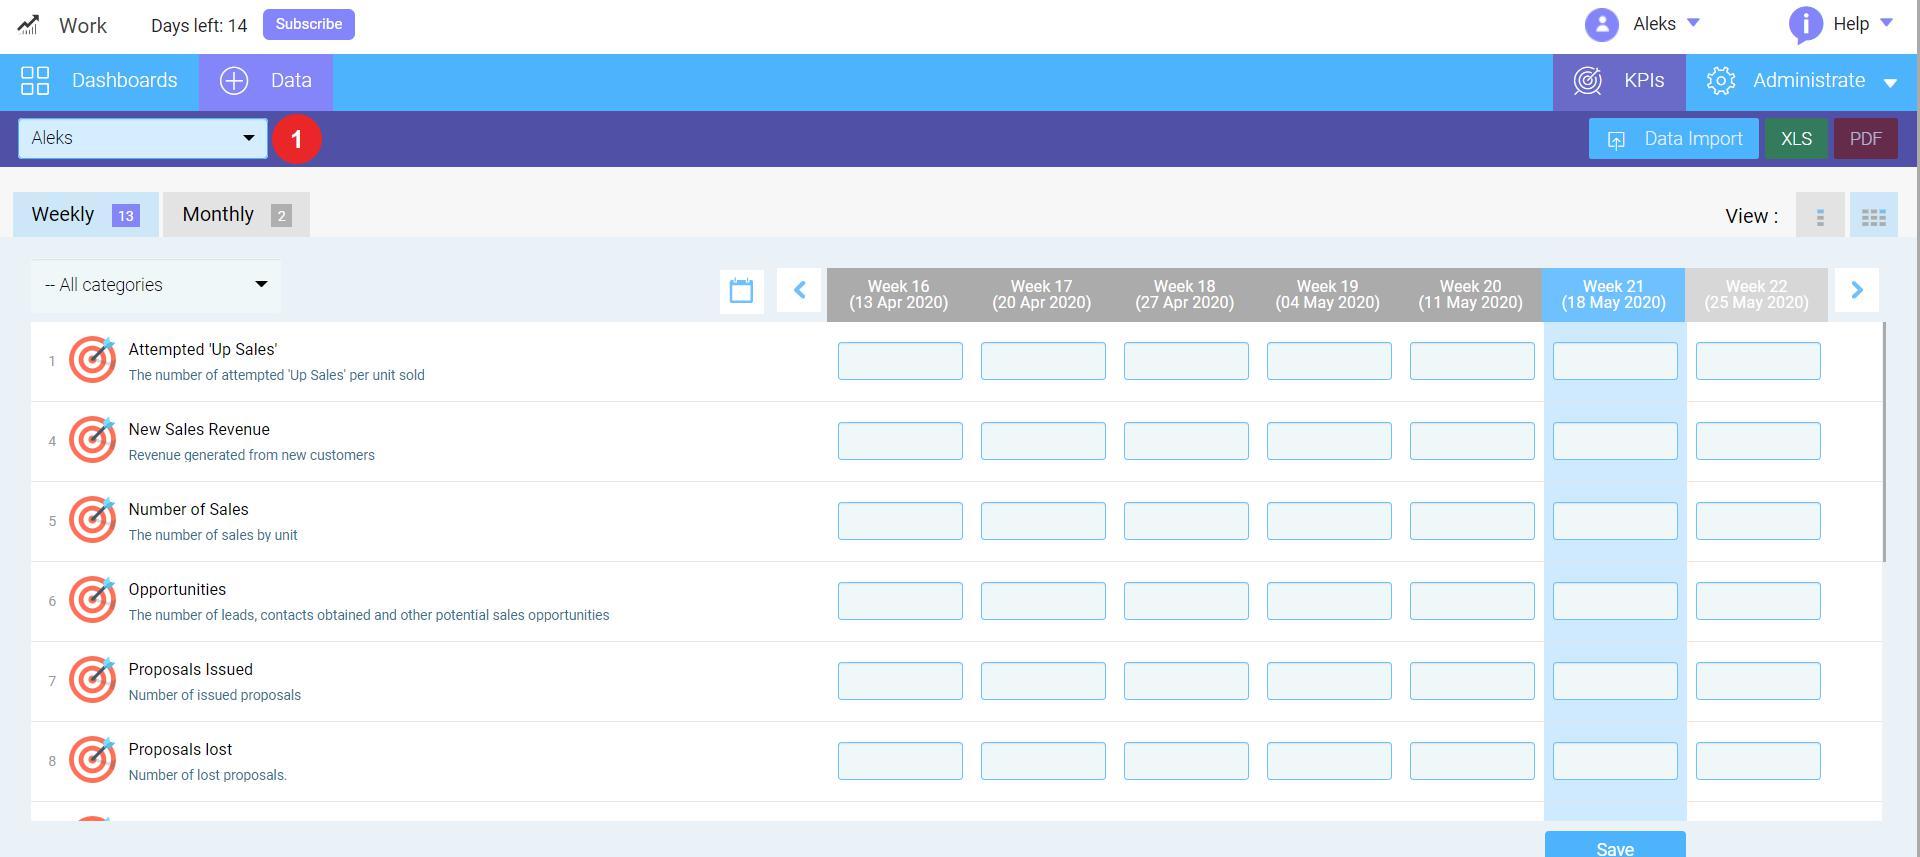
Such user categories as Managers, Directors, Admins and Owners are allowed to fill in and modify another user's KPI fields. To change another user's KPI sheet, follow these steps:
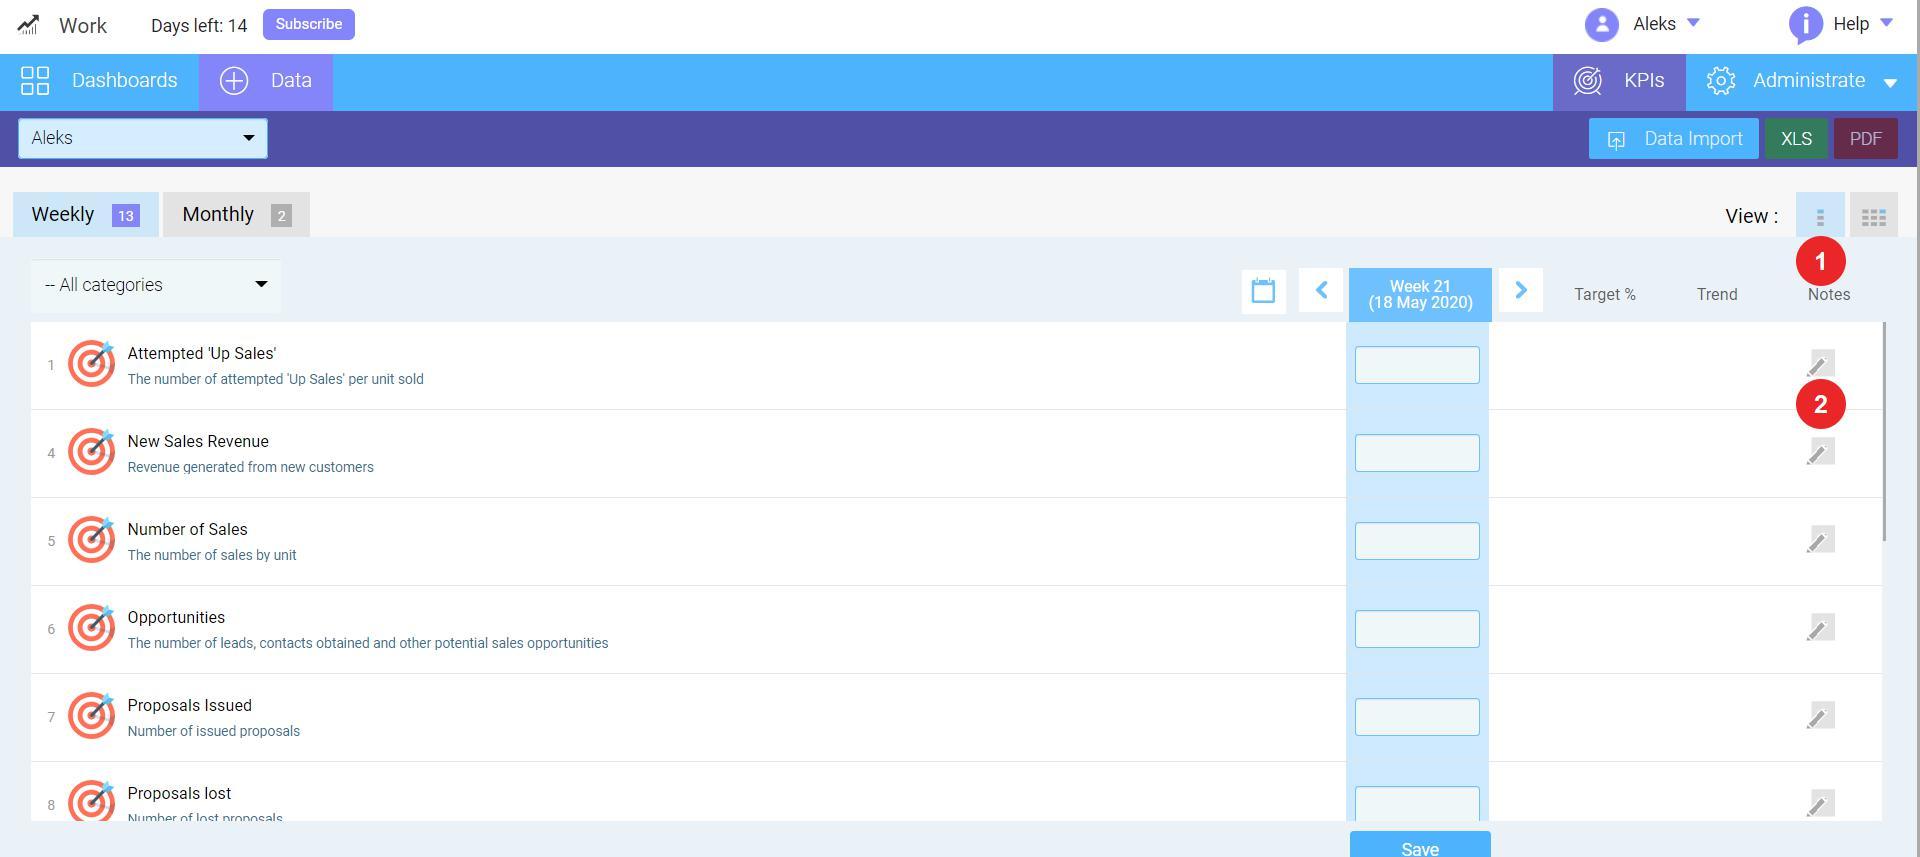
Notes are helpful both for you and for other users who may work with your KPI data. They will appear on dashboards and on some report views. To add a note, follow these steps:
Some accounts with additional rights and privileges are allowed to set Targets at the KPI entry / edit sheet. This can be usefully if targets are temporary or changing frequently. To change the target, follow these steps:
The data from Excel file can be directly imported with the help of KPI Entry screen. More information about Excel data importing can be found here.
You can configure your interface to display several time periods simultaneously.
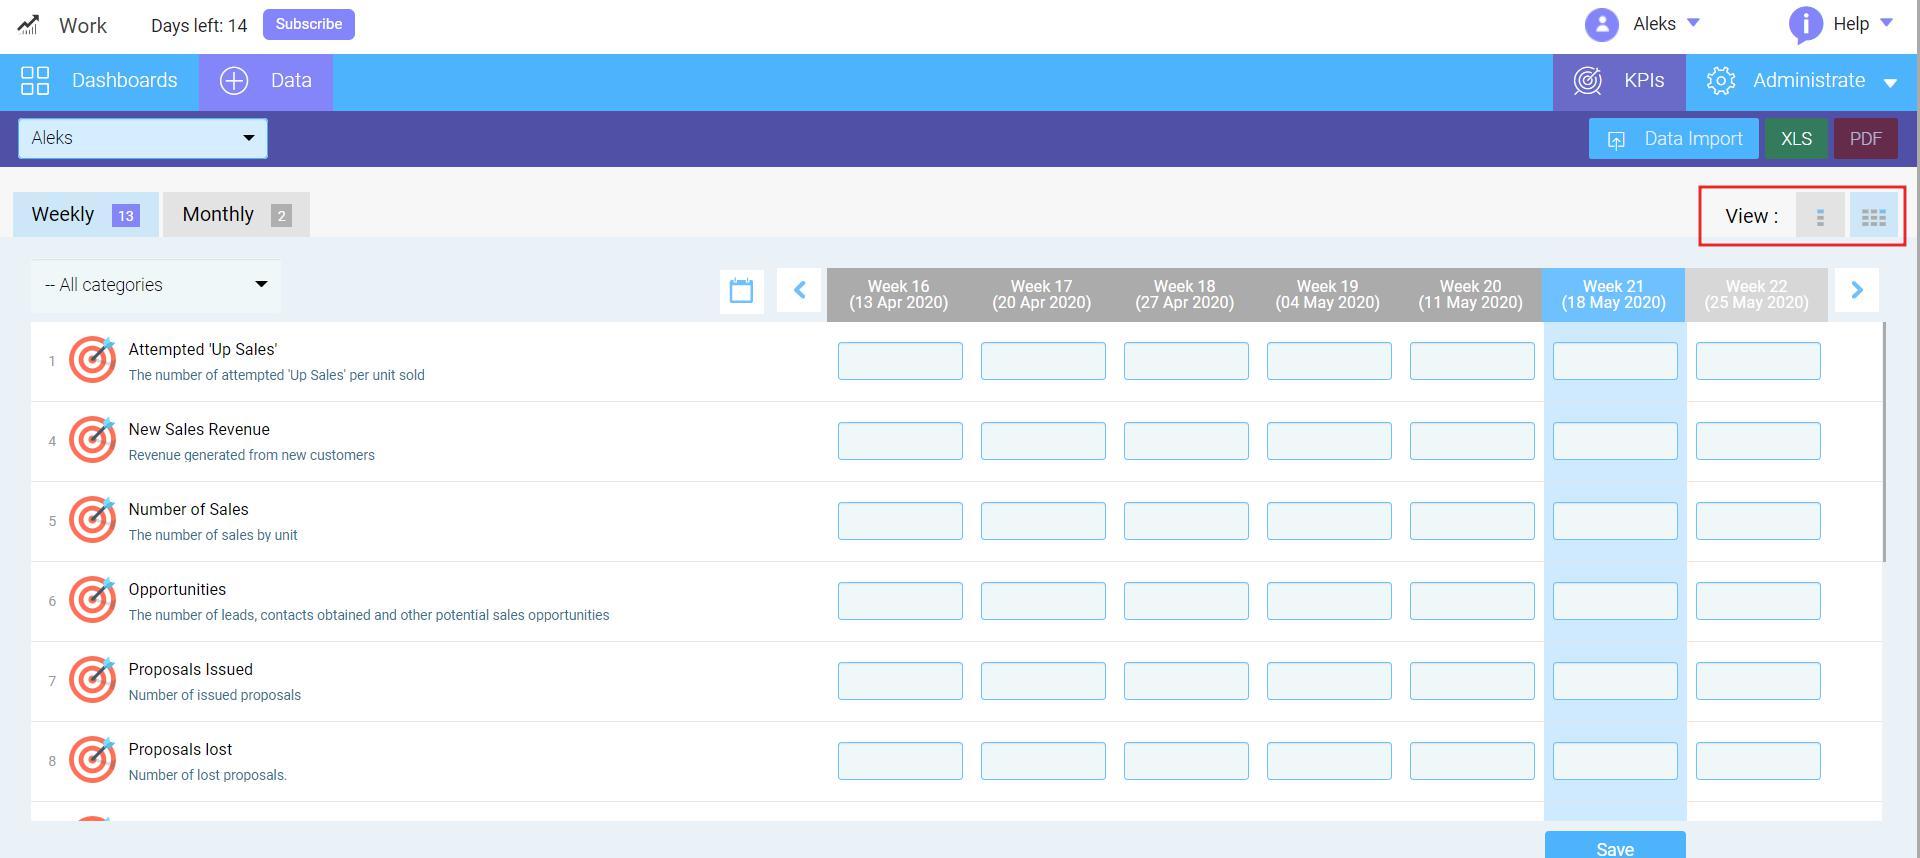
To display several periods at the same time, click the view toggle button.
The interface will remain the same, but now you will be able to work with data from several periods at once. Target
information will be displayed under the actual data entry selected.
Changing dates, editing values, entering, modifying targets and selecting KPI categories remains the same as in a single
entry.
Please Note: You cannot use notes in a multiple entry view. To add a note, switch back to single view.
Looking for anything specific article which resides in general queries? Just browse the various relevant folders and categories and then you will find the desired article.
Contact Us